5 Creative Uses for Your Old 128GB NVMe SSD (Beyond Storage)
Introduction
If you’ve been building PCs or salvaging parts from old laptops for a while, you probably have a few tiny 64GB or 128GB NVMe SSDs gathering dust in a drawer. These drives are too small to serve as primary storage in today’s systems, but they’re still fast, reliable, and battery-friendly. Tossing them isn’t smart—and using them as cold storage is a waste of their speed. Instead, put that forgotten NVMe to work with one of these five practical repurposing ideas.

What You Need
- One or more old 64GB or 128GB NVMe SSDs (M.2 form factor)
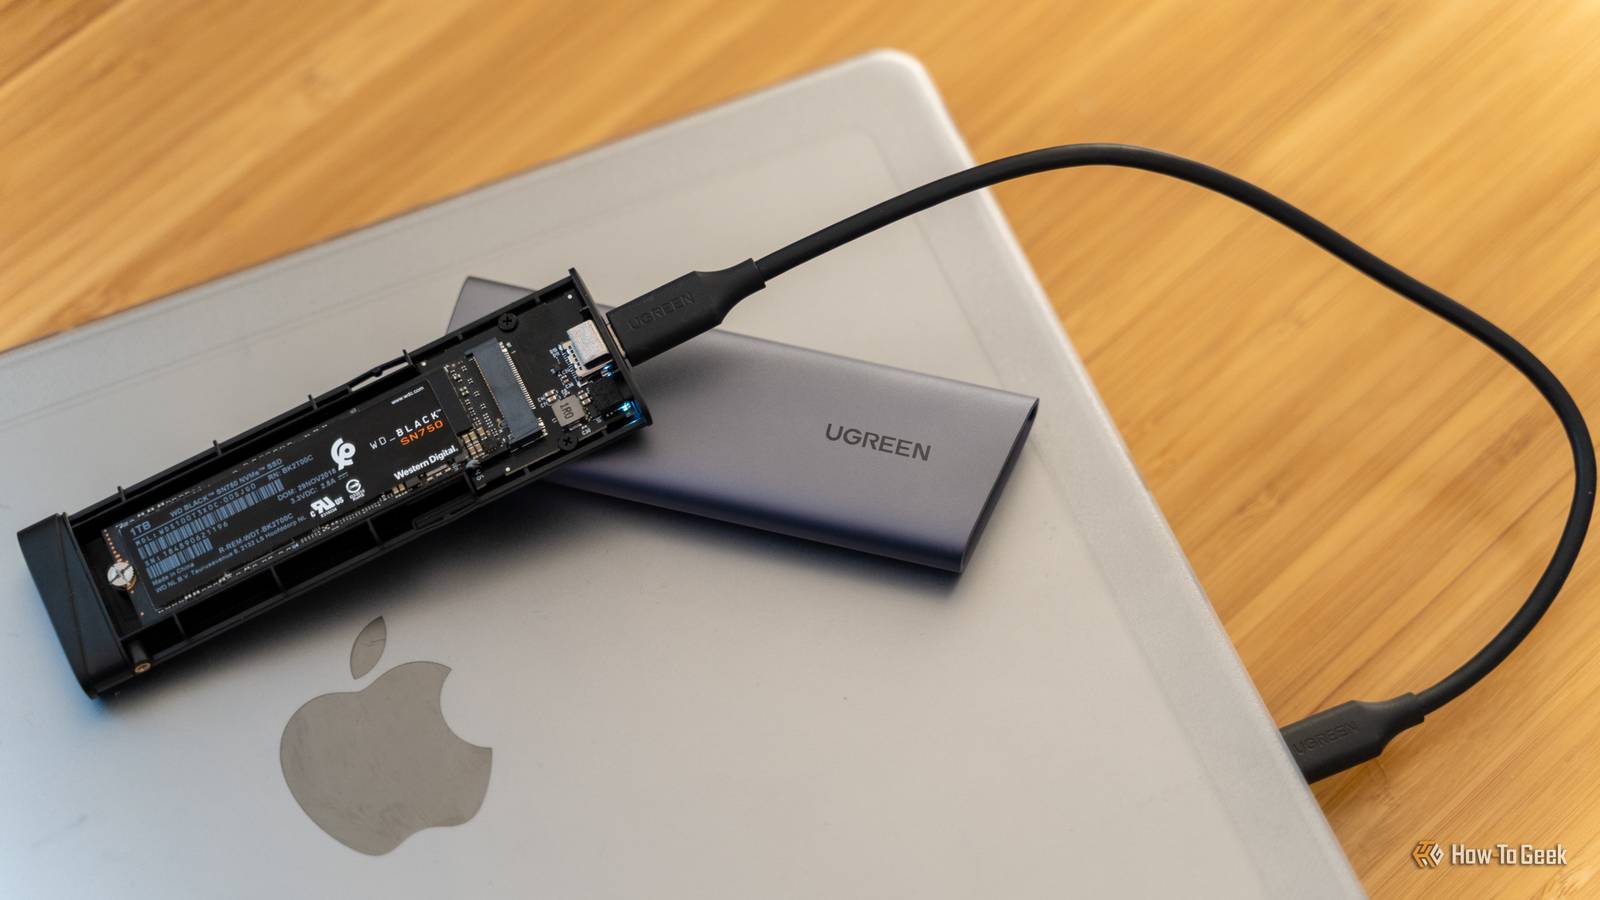
- USB‑C to NVMe enclosure (highly recommended for portability)
- Desktop PC or laptop with an available M.2 slot (optional, for internal use)
- Small screwdriver set (for opening the enclosure and securing the drive)
- Software tools: disk utility (Windows Disk Management, macOS Disk Utility, or Linux
fdisk/parted) and a bootable USB creation tool (Rufus, BalenaEtcher, or Ventoy) - Optional: USB 3.2 Gen 2 cable for maximum speed
Step-by-Step Guide: 5 Better Uses for Your Old NVMe SSD
Step 1: Transform It into a High-Speed Portable Drive
An NVMe SSD inside a USB‑C enclosure makes an incredibly fast external drive—far quicker than a standard USB flash drive or a hard disk enclosure. The 128GB capacity is perfect for moving large project files, app installers, or a portable OS.
- Purchase a USB‑C to NVMe enclosure (most support 2230 and 2280 sizes, but confirm for your drive).
- Insert the NVMe SSD into the enclosure following the manufacturer’s directions (usually sliding it in at an angle and securing with a screw).
- Connect the enclosure to your computer’s USB‑C or USB‑A port (using an adapter if needed).
- Format the drive to your preferred filesystem: exFAT for cross‑platform compatibility, NTFS for Windows, or APFS for macOS.
- Label the drive (e.g., “Project Transport”) and start transferring files at speeds up to 1GB/s (depending on your USB interface and drive model).
Step 2: Dedicate It to a Game Library or Launcher Cache
Modern games are huge, but smaller indie titles or older AAA games fit perfectly on 128GB. Use the drive exclusively for game installations or as a cache drive for gaming launchers (Steam, Epic, etc.).
- Install the NVMe SSD inside your desktop or in an external enclosure.
- Open your game launcher (e.g., Steam → Settings → Downloads → Steam Library Folders).
- Add the NVMe drive as a new library folder.
- Move smaller games to this drive to free up space on your main SSD.
- (Advanced) Use the drive as a shader cache or pre‑compiled shader storage for applications like Resident Evil 4 or Hogwarts Legacy to speed up loading.
Step 3: Create a Bootable Rescue Drive or Live OS
128GB is plenty for a full Linux live environment, a Windows To Go workspace, or a multi‑boot rescue toolkit. Keep it in your bag for emergency repairs or temporary computing.
- Download an ISO of your preferred live OS (e.g., Ubuntu, Fedora, or a Windows To Go version).
- Use Rufus (Windows) or BalenaEtcher (macOS/Linux) to write the ISO to the NVMe drive (in an enclosure or internal slot).
- Set your computer’s boot order to prioritize USB/SATA boot (if external) or the NVMe slot (if internal).
- Boot into the live environment—now you have a portable, high‑speed OS that leaves no trace on the host PC.
- Consider adding multiple ISOs using Ventoy for a multi‑boot stick that can run Windows, Linux, and diagnostic tools from the same drive.
Step 4: Use It as a Scratch Disk for Creative Work
Video editors, 3D designers, and photographers need fast temporary space for caches, previews, and scratch files. Your old NVMe SSD is perfect for this role—even if it’s only 128GB.
- Install the NVMe drive internally in your PC or connect it externally via a high‑speed enclosure (Thunderbolt 3/4 or USB 3.2 Gen 2x2 preferred).
- Format the drive to the optimal filesystem for your creative app (usually NTFS for Windows, APFS for macOS).
- Open your application’s preferences (e.g., Adobe Premiere Pro → Preferences → Scratch Disks).
- Set the scratch disk location to the NVMe drive—assign video previews, audio previews, and media cache to it.
- Restart the application and enjoy faster timeline scrubbing, quicker render times, and smoother multitasking.
Step 5: Build a Low‑Power Media Server Cache
If you run a Plex, Jellyfin, or Emby server on a Raspberry Pi or low‑power mini PC (like a DeskMini or NUC), a 128GB NVMe can serve as the metadata and transcoding cache drive.
- Attach the NVMe SSD via USB‑C to your media server device (or install it internally if using an x86 mini PC).
- Format the drive to ext4 (Linux) or NTFS (Windows).
- In your media server software, set the transcoding temporary directory to the NVMe drive—this stores buffered video segments during transcoding.
- Point the metadata storage to the same drive so cover art, subtitles, and library database files load quickly.
- Monitor disk usage—128GB is enough for moderate metadata but may need periodic cleanup if you have a huge library.
Tips & Warnings
- Always handle NVMe drives with care. They are sensitive to static discharge and physical damage. Use an anti‑static wrist strap when installing internally.
- Check your enclosure. Not all USB‑C enclosures support NVMe’s full bandwidth. Look for ones with RTL9210B or JMicron JMS583 chipsets for reliable performance.
- Heat management. Some NVMe drives run hot under sustained load. For scratch‑disk or cache use, consider a small heatsink or a well‑ventilated enclosure.
- Regular backups. If you use the NVMe as a rescue drive or game library, periodically back up important data—flash memory can fail without warning.
- Don’t use for long‑term cold storage. NVMe drives lose charge over time and may become unreadable after a few years of disuse. They excel in active roles.
Related Articles
- How to Protect Your Development Environment from the node-ipc Backdoor Attack
- Automated Pipeline Reveals Top Coding Models from Hacker News Discussions
- Ransomware Crisis Hits Record High in 2025 Despite Decline in Profitability, Mandiant Warns
- UNC6692's Snow Flurries Campaign: Social Engineering and Custom Malware in Enterprise Attacks
- New Tool Automates Hacker News Analysis to Identify Top Coding AI Models
- Q1 2026 Exploit Trends: Key Vulnerabilities and Attack Vectors
- Weekly Cyber Threat Roundup: April 27 Edition – Key Incidents and Emerging Risks
- From Theater Giants to PC Speakers: The Rise and Fall of Altec Lansing